Just sharing how this worked for me — not financial or legal advice. Maya’s flow, limits, and rules change over time, and app screens differ by region and version, so always follow what’s on screen and check Maya’s official app for the latest.
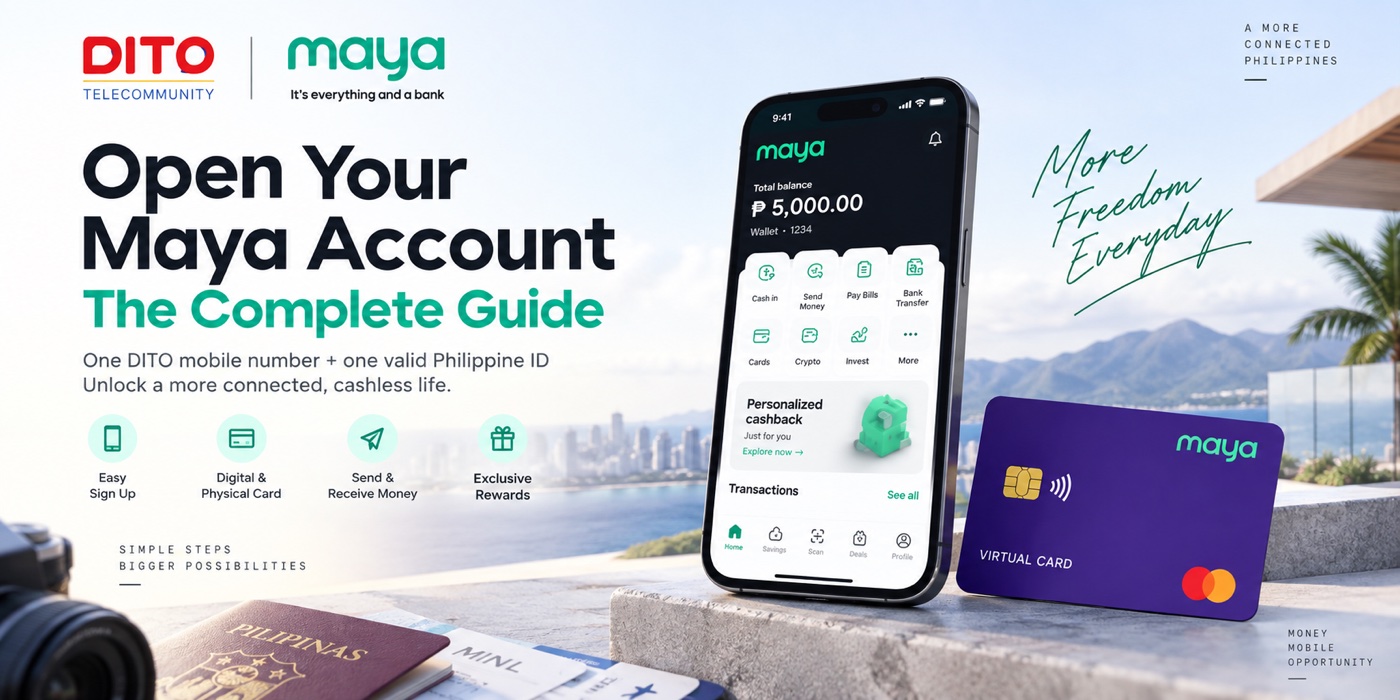
I’ve been writing about cross-border banking plumbing for a while, and the Philippines route stays underrated. Not because it’s fancy — because it’s cheap, low-friction, and it actually works. One Maya account gives you a Philippine local wallet, a savings account, and a virtual card, and later it can handle local payouts and payment verification for some overseas services.
The one prerequisite: a Philippine mobile number
There’s one requirement you can’t route around: you need a Philippine local mobile number first. DITO issues an eSIM. If your phone can’t do eSIM — a non-eSIM iPhone, or an Android that needs a physical SIM — you’ll need a card-writing tool to write the eSIM profile onto a physical card and then use it as a normal SIM. The one I use for that is Xesim (I wrote a separate guide on it).
Step 1 — Register the basic account
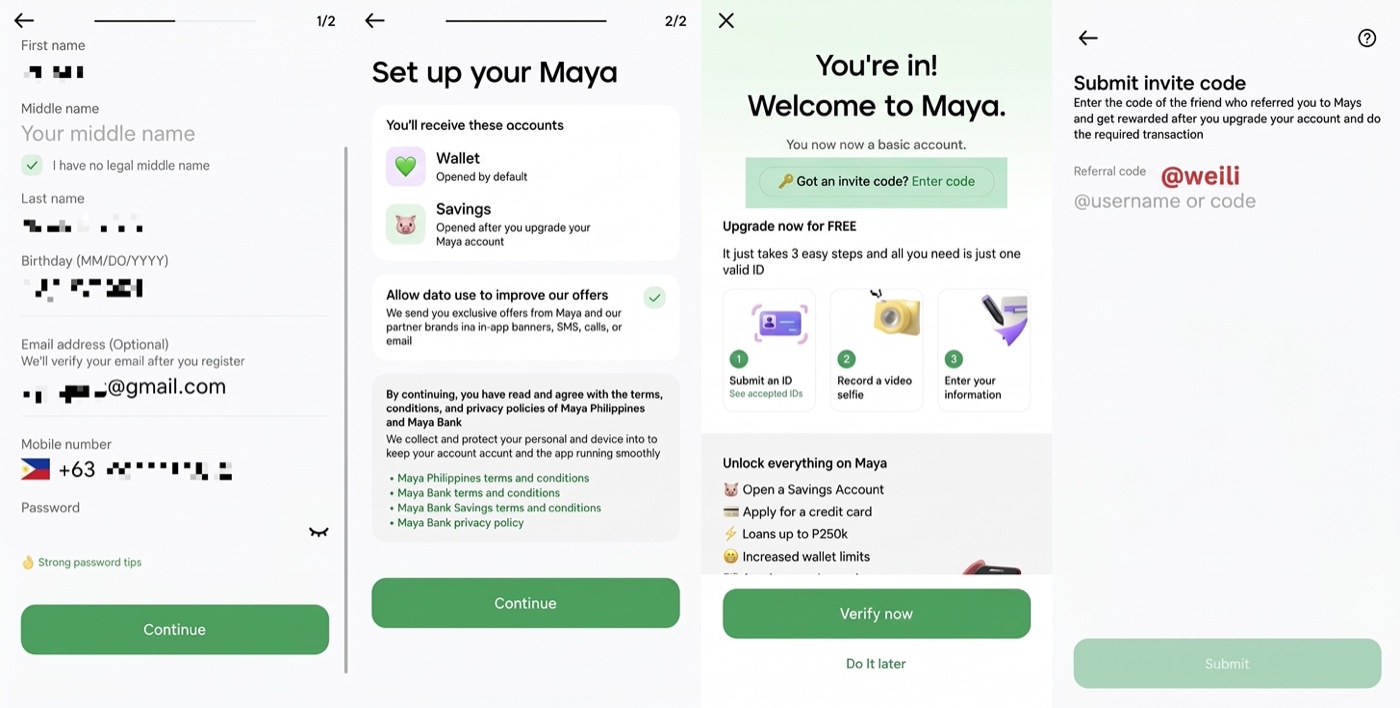
Download the Maya app and tap Start an account. The first screen is simple:
- First name — your given name.
- Middle name — most Chinese passports have none, so just tick I have no legal middle name.
- Last name — your surname.
- Birthday — note the format is MM/DD/YYYY.
- Email address — optional, but worth adding; it makes account recovery easier later.
- Mobile number — starts with +63; use your DITO number.
- Password — set a strong one and keep it safe.
The single most important thing on this screen: the name has to match your passport exactly — same romanization, same order, same spaces, same hyphens. Later, KYC compares what you typed against the OCR read from your passport, and if they don’t line up it gets bounced.
The second screen explains you’ll get two accounts: a Wallet (opened by default) and Savings (opens only after you upgrade — i.e. finish KYC). There’s a “use my data for personalized offers” toggle, on by default — you can turn it off, it doesn’t affect opening the account. Agree to the terms and tap Continue. The third screen shows “You’re in! Welcome to Maya” — your basic account is open.
The invite code (and the ₱50 voucher)
On that welcome screen there’s a line of small text: Got an invite code? Enter code. You can also reach it later from the profile menu under Submit invite code. The reward is two-way: you get a ₱50 Maya voucher, and the referrer gets a random amount between ₱50 and ₱2,000. If you’d like to use mine, the code is @weili.
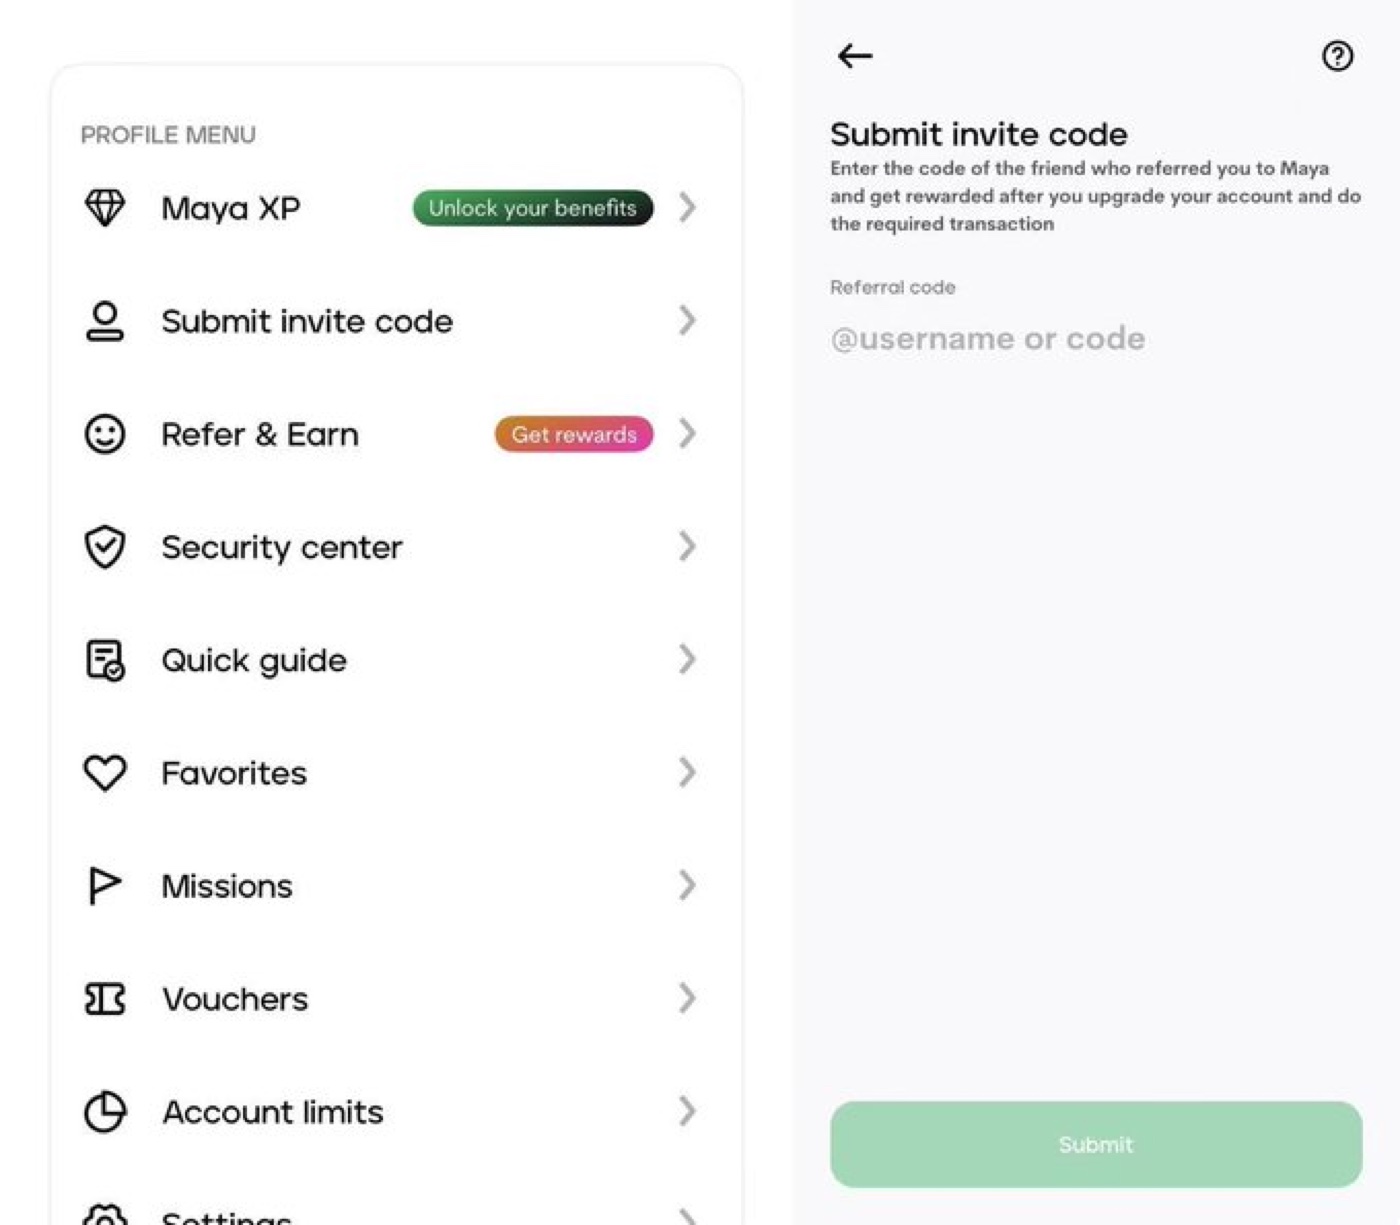
A few things about that ₱50 so there are no surprises. To actually receive it you need to: enter the code → top up → complete the KYC upgrade → and make at least one transaction of ₱100 or more. The easiest qualifying transaction is loading airtime onto your own DITO number. The voucher is issued to your wallet within 30 days after the month you registered, and you claim it manually under Vouchers on the app home screen. Once it lands, you have 60 days to claim it or it expires.
Disclosure: @weili is my own Maya invite code, so if you use it I may receive a referral reward from Maya (and you get your ₱50 voucher). It’s completely optional — the sign-up works exactly the same without it.
Step 2 — Upgrading the account: the full KYC
This is the important part. The basic account is very limited — low transfer caps, no savings account, no card. The useful stuff only unlocks after you upgrade:
- A savings account (Maya Savings, which earns interest)
- The ability to apply for a credit card
- A loan line of up to ₱250,000
- Much higher wallet limits
Maya says the upgrade is three steps and needs just one valid ID. For foreigners it takes a few extra screens. On the first “Verify your account” screen, don’t fill in the name/ID fields at the top — look instead at the bottom of the page for a line of green text: Not a Filipino citizen? Use a different ID. Tap that. You’ll get a long list of IDs, almost none of which apply to us — scroll all the way to the bottom to the section marked FOR FOREIGNERS and choose Foreign Passport.
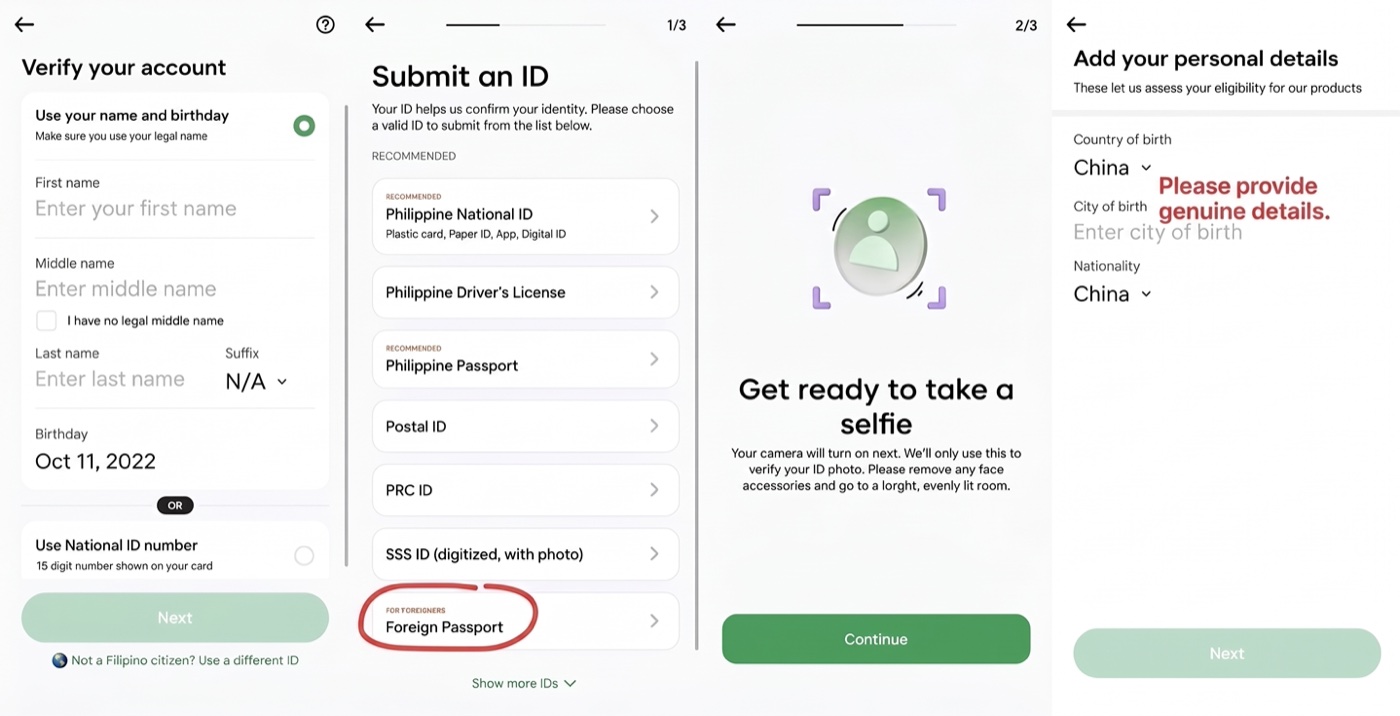
Next you upload your passport and record a video selfie. A few things I learned the hard way when photographing the passport photo page:
- Shoot the physical original, not a screen — glare and moiré will break the OCR.
- Find even lighting; don’t let a shadow fall across the two machine-readable lines.
- Keep all four corners inside the frame — don’t crop it.
Then comes the “Get ready to take a selfie” step — a short video selfie for liveness. After that you fill in your personal details, and here you just answer honestly: Country of birth (China), City of birth (yours), Nationality (China). These just need to match your passport — no massaging required.
Address and work details
The Edit your address screen has two parts, and it’s worth reading carefully:
- CURRENT ADDRESS — must be a Philippine address. You pick Province → City/Town/Municipality → Barangay (the smallest administrative unit in the Philippines) → House no., building, street → Zip code. These are cascading dropdowns: the city list appears after you pick the province, and the barangay list after the city. The zip usually auto-fills.
- PERMANENT ADDRESS — must be a country outside the Philippines. This is where you put your real address from your ID: set Country to China and fill in the province/city/street truthfully. This field is designed for foreigners, so filling it in honestly is exactly right.
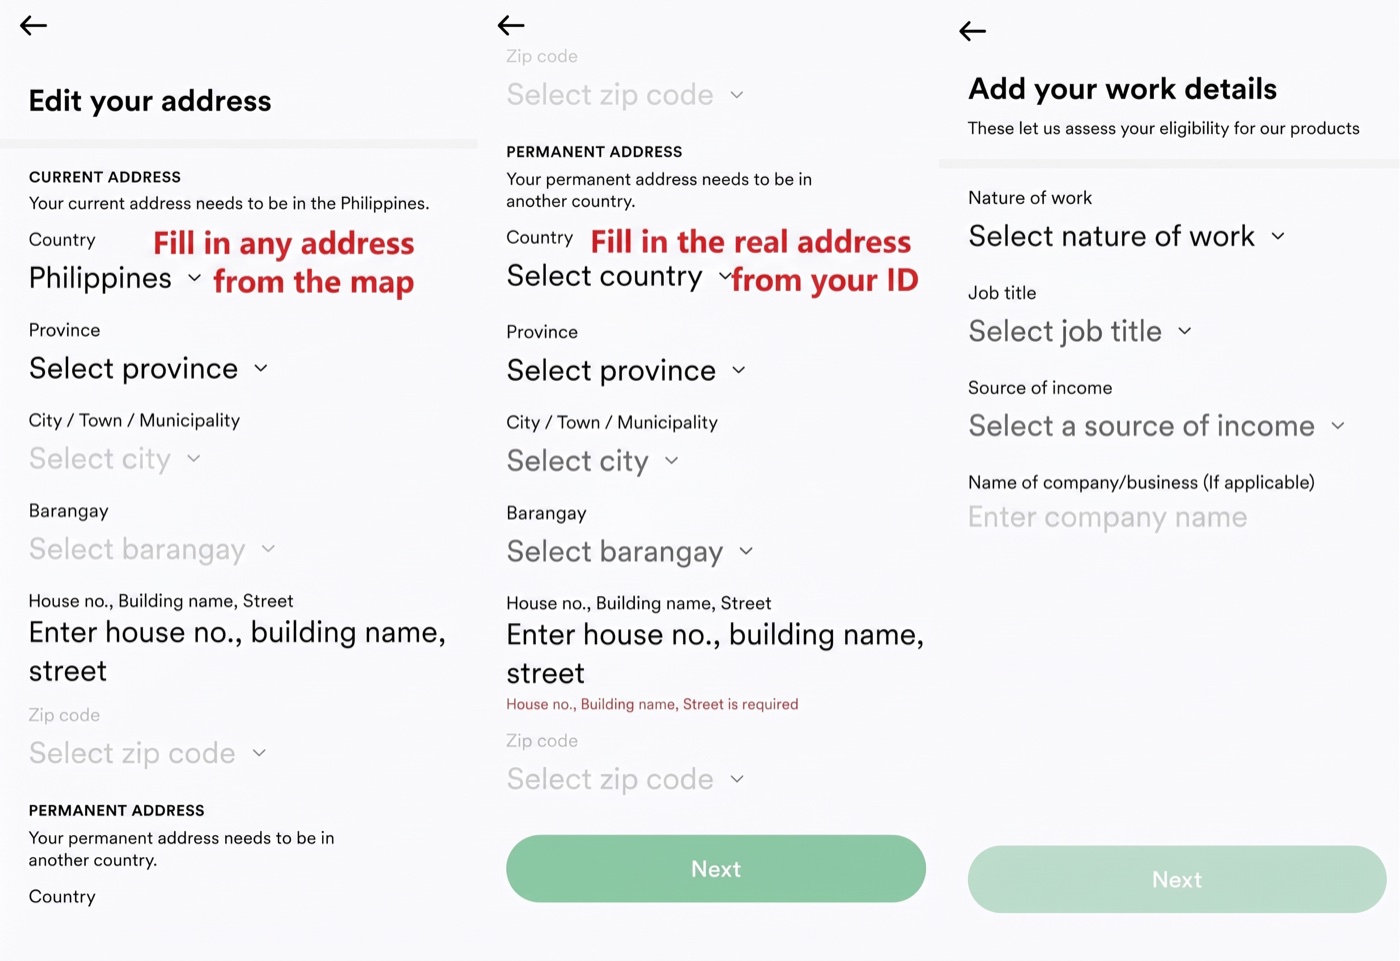
Then the work details — Nature of work, Job title, Source of income, and Name of company/business (optional). Just fill these in normally; they only affect your risk rating and later credit limits, not whether the account opens.
Confirm and submit
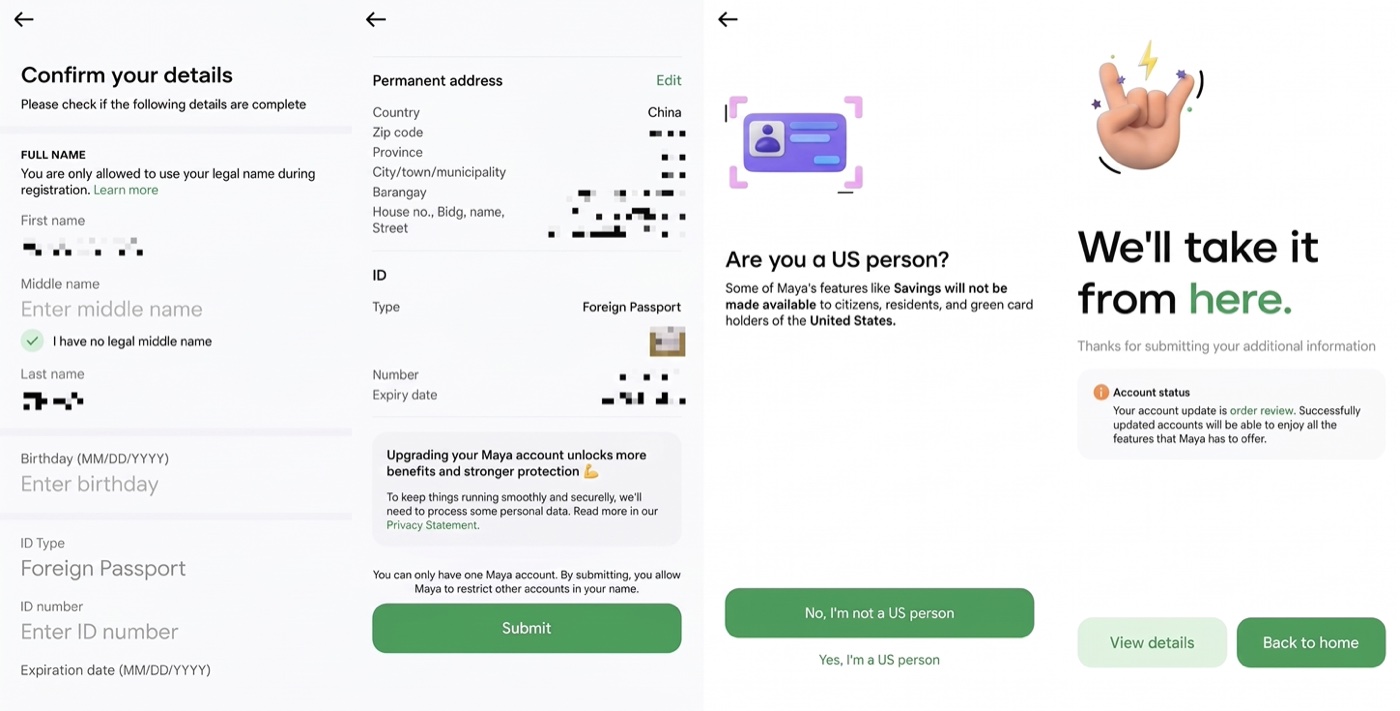
The Confirm your details screen summarizes everything and asks for two more items: your ID number (passport number) and Expiration date (MM/DD/YYYY). Check the name once more here — this is exactly where the surname/given-name mix-up bites, so make sure it passes in one go. There’s a note at the bottom: You can only have one Maya account. Don’t try to open a second one — opening another account under the same identity can get every account in your name restricted.
Tap Submit and you’ll hit a US tax-status question: Are you a US person? The screen states plainly that Savings and similar features are not available to US citizens, residents, or green-card holders. As mainland-passport holders we choose No, I’m not a US person. When you see “We’ll take it from here”, it’s submitted, and the status shows under review. In my case the result came back in under an hour, delivered by app push and SMS.
Common questions
My review got rejected — now what? The three most common causes are a reversed name, a blurry passport photo, and address info that doesn’t match reality. The first two you can just resubmit; for the third, fix the address issue before trying again, since the number of retries is limited.
What if my DITO number gets suspended? Maya’s login and transaction verification both depend on that number. If it’s cut off, the account is basically dead — so keeping the number alive matters. (That’s its own topic; I’ll cover how to keep a DITO number active separately.)
Can I use it without KYC? Yes, but only the most basic wallet, with very low limits — no savings, no card.
Can I open a virtual card? Yes, after the upgrade you can open a Maya virtual card.
Who can’t fully use it
- US citizens / US tax persons: under US FATCA rules, Maya officially does not currently support US citizens or US tax residents opening and using Maya Savings (the interest-earning account) or Maya Funds (investments). A US passport can still pass identity verification for the basic Wallet, but the bank-side savings and investment products are restricted.
- Sanctioned or high-risk jurisdictions: passports from countries on the FATF blacklist or under UN / Philippine central-bank sanctions (e.g. Iran, North Korea) won’t pass review.
The Maya card
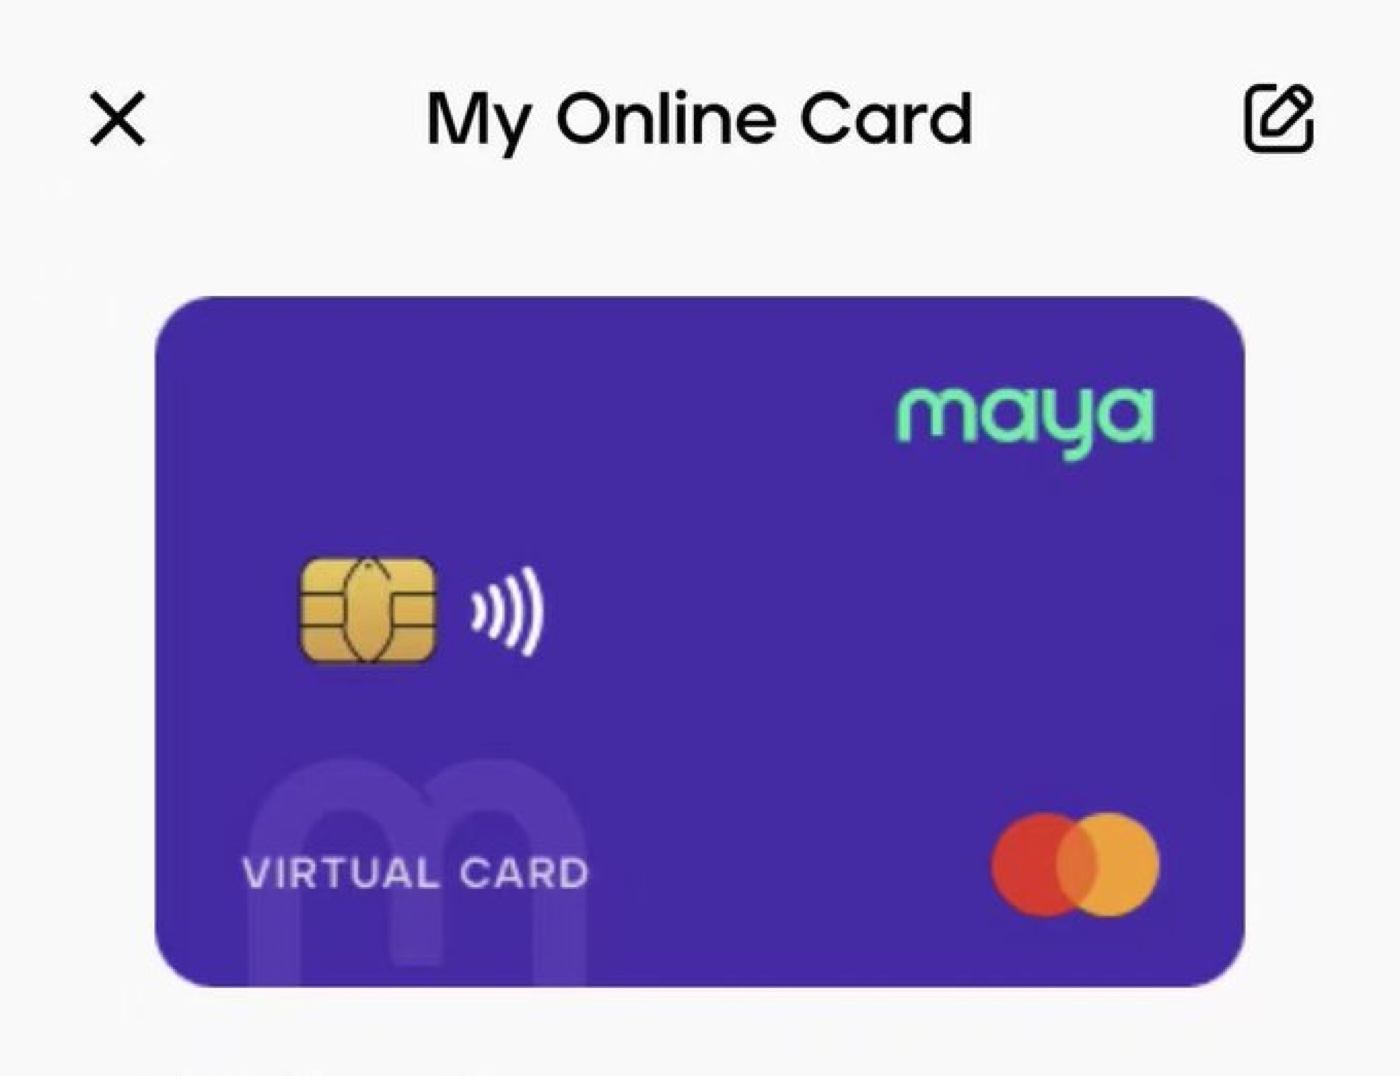
Once the upgrade goes through, you can open a Maya card. One thing to flag up front: this card sits on the bank side, so — like Maya Savings — it isn’t available to US persons; if you hold a US passport or are a US tax resident, you won’t be able to apply for it. For everyone else, it opens after the upgrade. I’ll cover what it’s actually good for in a later piece.
Maya’s onboarding, limits, fees, and eligibility rules change over time, and the exact screens vary by app version and region. Treat this as a snapshot of my own experience, follow the in-app instructions, and check Maya’s official app or website for the current process before you rely on any of it.
Leave a Reply